After doing a lot of races on our little racetrack on our office desk, I thought that it would be time to build a real racetrack for our bits. The track had to be transportable in my car, so the size was limited to 160 x 90 centimeters. To reduce wight, it was build as a wooden frame with a thin wooden plate on it.
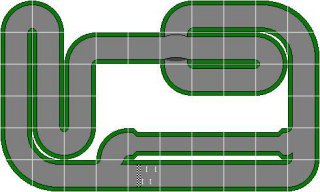 |
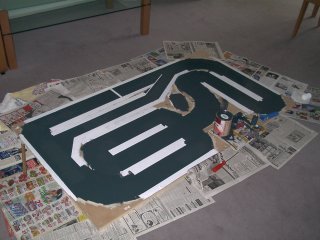
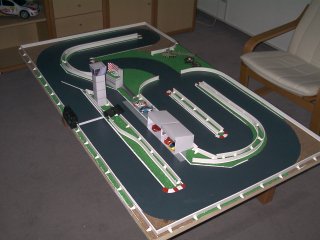
The track was designed with the computer, and after several designs, I found the one on the left as a good idea. I first planned to build a bridgt, but until today I had not time to replace the crossing there with a bridge as planed.
|
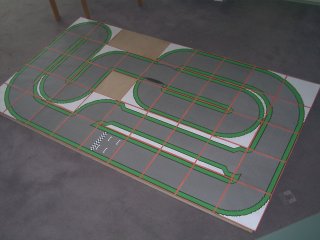
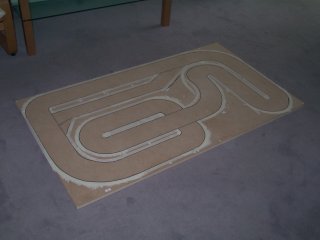
The plan was then printed in 1:1 scale and tested with the bits if they would be able to race on it. After that, the track was cut out and drawn on the plate.
|
|
 |
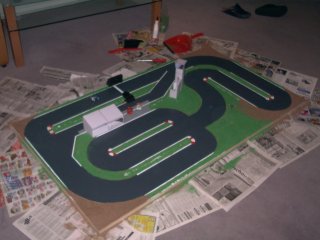
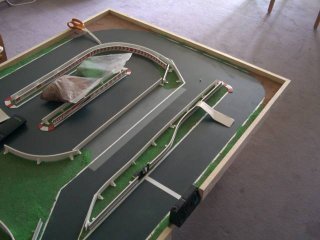
After transferring the track on the plate, everything outside of it was taped and the area which later should be grass or gravel was covered with old newspapers. |
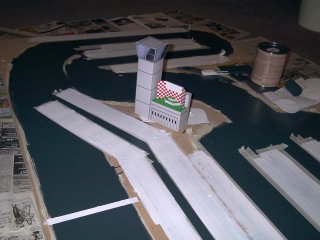
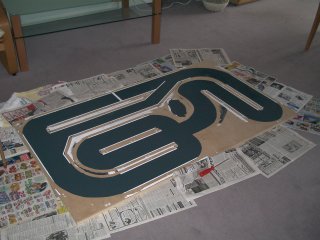
| The track was painted with black color, and while I was waiting that the color was drying, I started to build the required race track buildings. Found as printable versions I the web, the first buildings completed were the race control tower and the winners podium. |
|
 |
The track was followed by the white lines at its edges. While I used normal acryl paint for the track, the white lines were made with Revell model color. I even managed not to paint the floor in the living room... :)
|
After the tape was removed, the track gave a good impression how it would later look like.
|
|
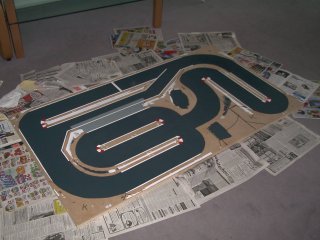 |
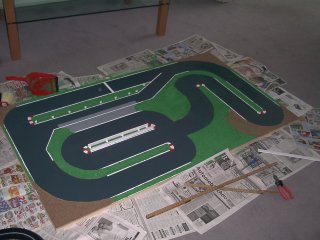
The last thing to paint was the gray founding for the pit lane boxes. Again, this was made with Revell model color. |
To make the gras and gravel, I decided to use model grass which was normaly used for a model train track, but it worked quite good here as well. It took several laywers of glue and model grass until it was looking ok.
In the meantime, the first of the pit lane boxes were build and the curbes were added. The curbes were made from cardboard, painted red and white.
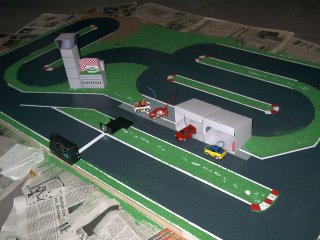
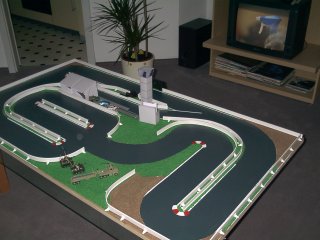
At the start & finish line, the time computer can be seen.
|
|
 |
Another view on the track form the opposite direction.
|
Now that the track itself was completed, I had to add some crash barriers - otherwise it would be impossible to keep the little bits on the track. I choosed the cover of a cable duct to build them - glued to some fittings which are normally used to hold racks in their position.
|
|
 |
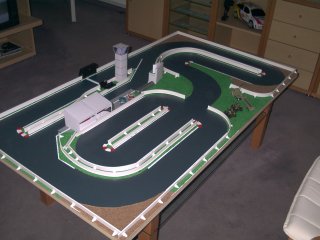
After adding all the crach barriers the Hürth Speedway
was completed and ready for the first test drives!
|
| The opposite direction... |
 |
 |
...some other views.... |
| ... and the last side. |
 |
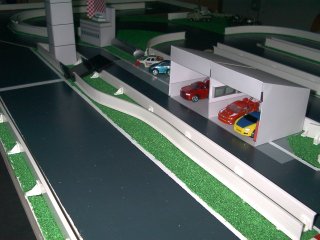 |
The pitlane with bit racers waiting to race. |
The test races showed, that the crasah barrier at the outside of the track was not ideal. It took away too much space from the already very narrow track. Therefore, it was removed, the holes were filled and planted with grass and I added a solid wooden frame outside the track.
Not to forget that all the other crash barriers were fitted with some commericals :)
|
 |
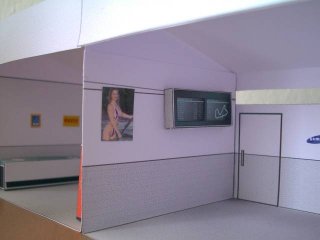 |
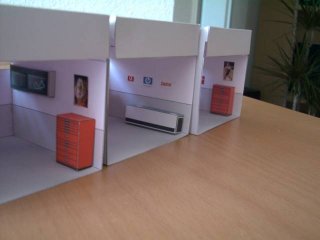
Finally, a look into the pit lane boxes, obviously some telemetry data of the cars is shown - and most importend - posters of swimsuit babes are there at the walls :) |
|
 |

