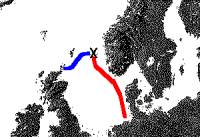
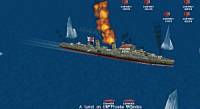
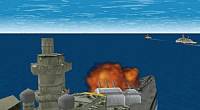
Battle 1: North Sea Breakthrough
|
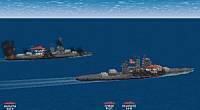
The first task was to send out the major ships based in Germany out into the Atlantic in March 1942, where they should meet the battlecruisers Scharnhorst and Gneisenau plus the heavy cruiser Prinz Eugen. Covered by the CL Nürnberg and a destroyer escort, the battleship Tirpitz and the heavy cruisers Admiral Hipper, Admiral Scheer and Lützow steamed up the Norwegian coast when the covering destroyers spotted several British cruisers and destroyers trying to intercept the German ships.
|

by Michael Emmerich
|
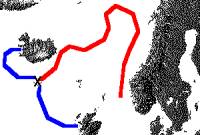
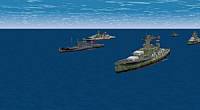
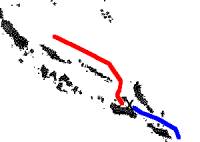
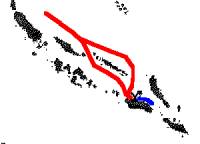
Battle 2: The Battle of Iceland
|
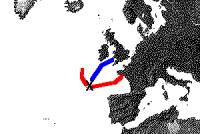
After the encounter with British ships in the North Sea, it got clear that the attempt to break into the North Atlantic secretly failed. The escorting CL Nürnberg and the escorting destroyers were send back to Norway as planned and the main fleet continued its way up to the north, waiting for bad weather. Only 36 hours later the visibility went down so the ships, grouped into two formations lead by the Tirpitz and Admiral Scheer turned west into the Atlantic. This time they used the Iceland-Farör narrows, but the British were waiting there already. In the early evening hours the shadow of a British cruiser appeared in the fog and the German ships prepared for battle....
|
by Michael Emmerich
|
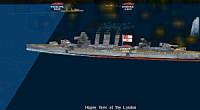
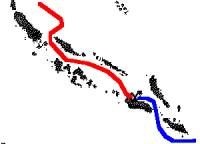
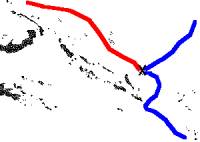
Battle 3: American Intervention
|
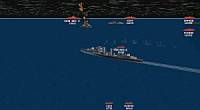
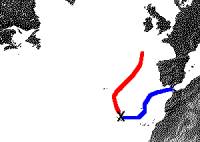
After the breakthrough in the North Atlantic, the German ships set a south western course towards the projected meeting point with the battlecruisers that left the French ports on the same day. Since most British ships were send to intercept the ships leaving the French bases, the only hope to stop the Tirpitz, Admiral Hipper, Admiral Scheer and Lützow is the US Atlantic fleet with their old battleships.
When the hipper was refuling at a German Troßschiff, the Funkmeßgerät of the Tirpitz detected a contact closing up from the south. At once, the other German ships accelerated to full speed to attack the approaching ships while the Admiral Hipper continued its refueling.
|
by Michael Emmerich
|
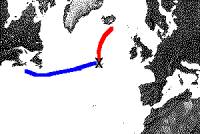
Battle 4: The Meeting
|
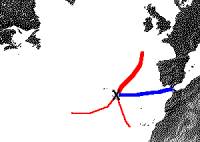
The British intelligence knew about the German plan to send out the battlecruisers Scharnhorst and Gneisenau from France to meet the battlegroup formed by the Tirpitz and the other ships. Therefore, they shadowed the German ships since they left their French bases and headed for the open Atlantic. Only a few hours before the two German groups meet, a British task force led by the battleship King George V attacked the westward sailing German ships, but despite to the original plan, the Tirpitz group was much closer than expected.
|
by Michael Emmerich
|
Battle 5: Resupply
|
During the battle that broke out when the two German task forces meet in the Atlantic, the Panzerschiff Admiral Scheer was so badly damaged that it had to be abandoned. The remaining ship, especially those of the Tirpitz group were so short on ammunition and fuel that they had to resupply with some tankers as soon as possible. Therefore, the OKM (Oberkommando der Kriegsmarine) ordered several supply ships east to the Azores where they should meet the two battlegroups.
But the British could intercept and decode those orders and they send out all ships of their Gibraltar based Force H to intercept the German supply ships. The heavy ships of force H were still on their way back to Gibraltar after a they escorted a convoy to Malta, therefore the only british ships available for this task were some cruisers.
|
by Michael Emmerich
|
Battle 6: Force H
|
After the succesful resupply operation, the German battlegroup lead by the battleship Tirpitz were surprised by a heavy storm while heading in a southern course. In the following night, the Tirpitz's radar detected several contacts closing up from south - the core of Force H searching for the German ships. Despite the bad weather, both sides started an intense night battle at close range.
|
by Michael Emmerich
|
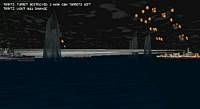
Battle 7: The Convoy
|
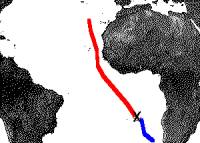
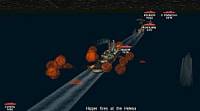
Force H was the last British chance to stop the German ships to advance into the South Atlantic. Without any further threat by British capital ships, the German task group continued its way south. Two weeks after the last battle, the B-Dienst on board of the Tirpitz received British radio transmissions, signaling that a lightly protected convoy left South Africa, heading for England.
The German task force commander saw its chance to inflict more damage to the British, therefore, he ordered a course change to intercept the transports. But when the lookouts finally sighted smoke clouds at the horizon, it got clear that it was no lightly protected convoy ...
|
by Michael Emmerich
|

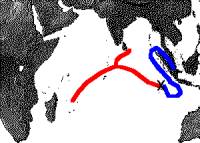
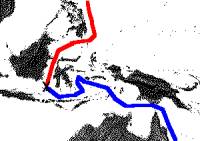
Battle 8: Surprise
|
After an uneventful voyage around the Cape of Good Hope, the German ships finally arrived in the Indian Ocean. As in several previous occasions, the engine systems of the heavy cruisers Prinz Eugen and Admiral Hipper proved to be very unstable and had several minor and major breakdowns during the last weeks. Therefore, during the next scheduled meeting with the supply ships, a major engine maintenance had to be done. The British knew that they had no chance to intercept the German ships until they would arrive in the operational area of Force Z, but they tried to locate the German supply ships before they could refuel and rearm the German warships. This failed - but the British cruisers arrived when the German ships were very vulnerable - while their resupply operation was in progress.
|
by Michael Emmerich
|
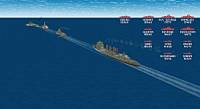
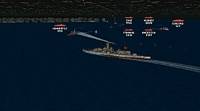
Battle 9: Force Z - The Battleline
|
Crossing the Indian Ocean, the German ships finally meet with two Japanese cruisers South of India and continued their way to South East Asia where the German Ships were planned to join the Japanese fleet.
The British however took their last chance to stop the German ships: After the loss of the Prince Of Wales and the Repulse in December of 1941, they had send four old battleships of the R-Class to Australia to prevent the Japanese to attack the former British colony. With the German ships heading for the Java Sea, a battlesline of those old battleships is the last attempt to stop the enemy.
|
by Michael Emmerich
|
Battle 10: Escort
|
After arriving in Japanese territory, the German ships had to maintained in Japanese bases for repairs and refits. The first ship that got operational again was the heavy cruiser Prinz Eugen. While the other ships got their battle damages repaired, the Prinz Eugen was attached to the convoy escort of an important troop convoy heading to the Java Sea. As most Japanese ships were operating in the central Pacific, only a few ships could cover the vulnerable transports. This fact was known by the USN because of their ability to read the Japanese radio transmissions and desperately looking for a major success, they sent out a cruiser force to intercept the convoy.
|
by Michael Emmerich
|
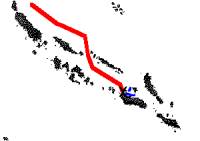
Battle 11: The Battle of Savo Island
|
In August of 1942, the USN attacked the Japanese troops on the Island of Guadalcanal. Capturing the still incomplete airfield and renaming it to Henderson field, the American advance was a major threat for Japanese units in the Solomon Islands.
As soon as the news about the American invasion arrived in Japan, a fast cruiser task force was send out to attack the American transports unloading their troops at the island. As no Japanese capital warship was available, the two fast German battlecruisers Scharnhorst and Gneisenau supported the Japanese cruisers. While the cruisers should advance to the American landing zones, the two battlecruisers were ordered to attack any American warship protecting the waters of Guadalcanal.
|
by Michael Emmerich
|
Battle 12: The Battle of Guadalcanal (I)
|
Despite the attacks on the US ships at Savo Island, the Americans were able to continue the invasion of Guadalcanal. In the early days of Novmenber 1942, a mixed Japanese/German fleet was send to the Island to bombard the Henderson Field airfield. Build around the battlecruisers Hiei and Kirishima, the German cruisers Lützow and Admiral Hipper took the lead of the ship heading for Guadalcanal. When passing Savo Island, several contacts were noticed by the Funkmessgeräte of the German ships - an Americna cruieser force protecting the island.
|
by Michael Emmerich
|
Battle 13: The Battle of Guadalcanal (II)
|
The first attempt to attack Henderson Field ended with a failure - the Japanese and German ships arrived too late to start their attack in darkness so they had to return. On their way back the Kirishima was attacked by US carrier based aircraft and got lost.
A few days later, a second attempt was started to attack Henderson field again. This time, the combined IJN/KM forces send all available capital warships the Hiei again plus the German Tirpitz and Scharnhorst. But the USN was prepared for another attack. They reinforced the defenders of Guadalcanal with additional ships and therefore a second, even larger battles took place in the waters of the Solomon Islands.
|
by Michael Emmerich
|
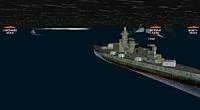
Battle 14: Tokyo Express
|
Because of the threat by USN aircraft, the Japanese resupplies their troops at Guadalcanal at night - with fast destroyer groups called "Tokyo Express". During the last days, the US troops on Gualdalcanal seemed to pull back to Henderson Field, giving the Japanese a chance to reinforce their troops with another Tokyo Express. Covered by a German battlegroup consisting of the Gneisenau, Admiral Hipper and Prinz Eugen, the destroyers closed to Guadalcanal when they run into a group of US APDs transporting troops away from the island! The combined forces took their chance to attack the helpless US ships, but then it got obvious that the APDs were not alone....
|
by Michael Emmerich
|
Battle 15: The Final Battle
|
In the last days of the year 1942, the combined Japanese-German fleet build a powerful surface fleet around the battleships Yamato, Musashi and Tirpitz. Send off to the waters of the Solomon Islands to fight any American Task force found there, the Japanese and their German allies steamed for a final, decisive battle.
The USN, aware of the danger to their troops on Guadalcanal, took all available battleships to stop the Japanese ships and both fleets meet for their final battle north of Guadalcanal.
|
by Michael Emmerich
|

